How to Contribute to Open Source
In this chapter, we'll guide you through the process of how to contribute to open source.
Finding Projects to Work On
One of the first challenges you might face when learning how to contribute to open source is finding a project to contribute to. Here are some tips to help you discover projects that align with your interests and skills:
-
Browse GitHub and GitLab: Both GitHub and GitLab host a vast number of open source projects. You can use their search functionality to find projects based on specific keywords, programming languages, or topics.
-
Follow your interests: Think about the tools, frameworks, and libraries you use or are interested in learning more about. Many of these projects are open source and welcome contributions from the community.
-
Join open source communities: There are numerous online communities, forums, and chat platforms dedicated to open source development. By joining these communities, you can connect with other developers, discover new projects, and find collaboration opportunities. In the Community, for example, we share good first issues, cool GitHub projects, and issues we have open on our repositories.
-
Leverage OpenSauced: OpenSauced is a platform that helps developers discover and contribute to open source projects. By using OpenSauced, you can find projects that align with your interests, skills, and goals.
To understand how to contribute in open source, it’s important to start by familiarizing yourself with the project’s guidelines and community standards.
Discovering Open Source with OpenSauced
OpenSauced is a powerful tool for finding open source projects to contribute to. To get started with OpenSauced, follow these steps:
-
Sign up for an account: Visit https://www.opensauced.pizza/ and sign up for an account using your GitHub credentials.
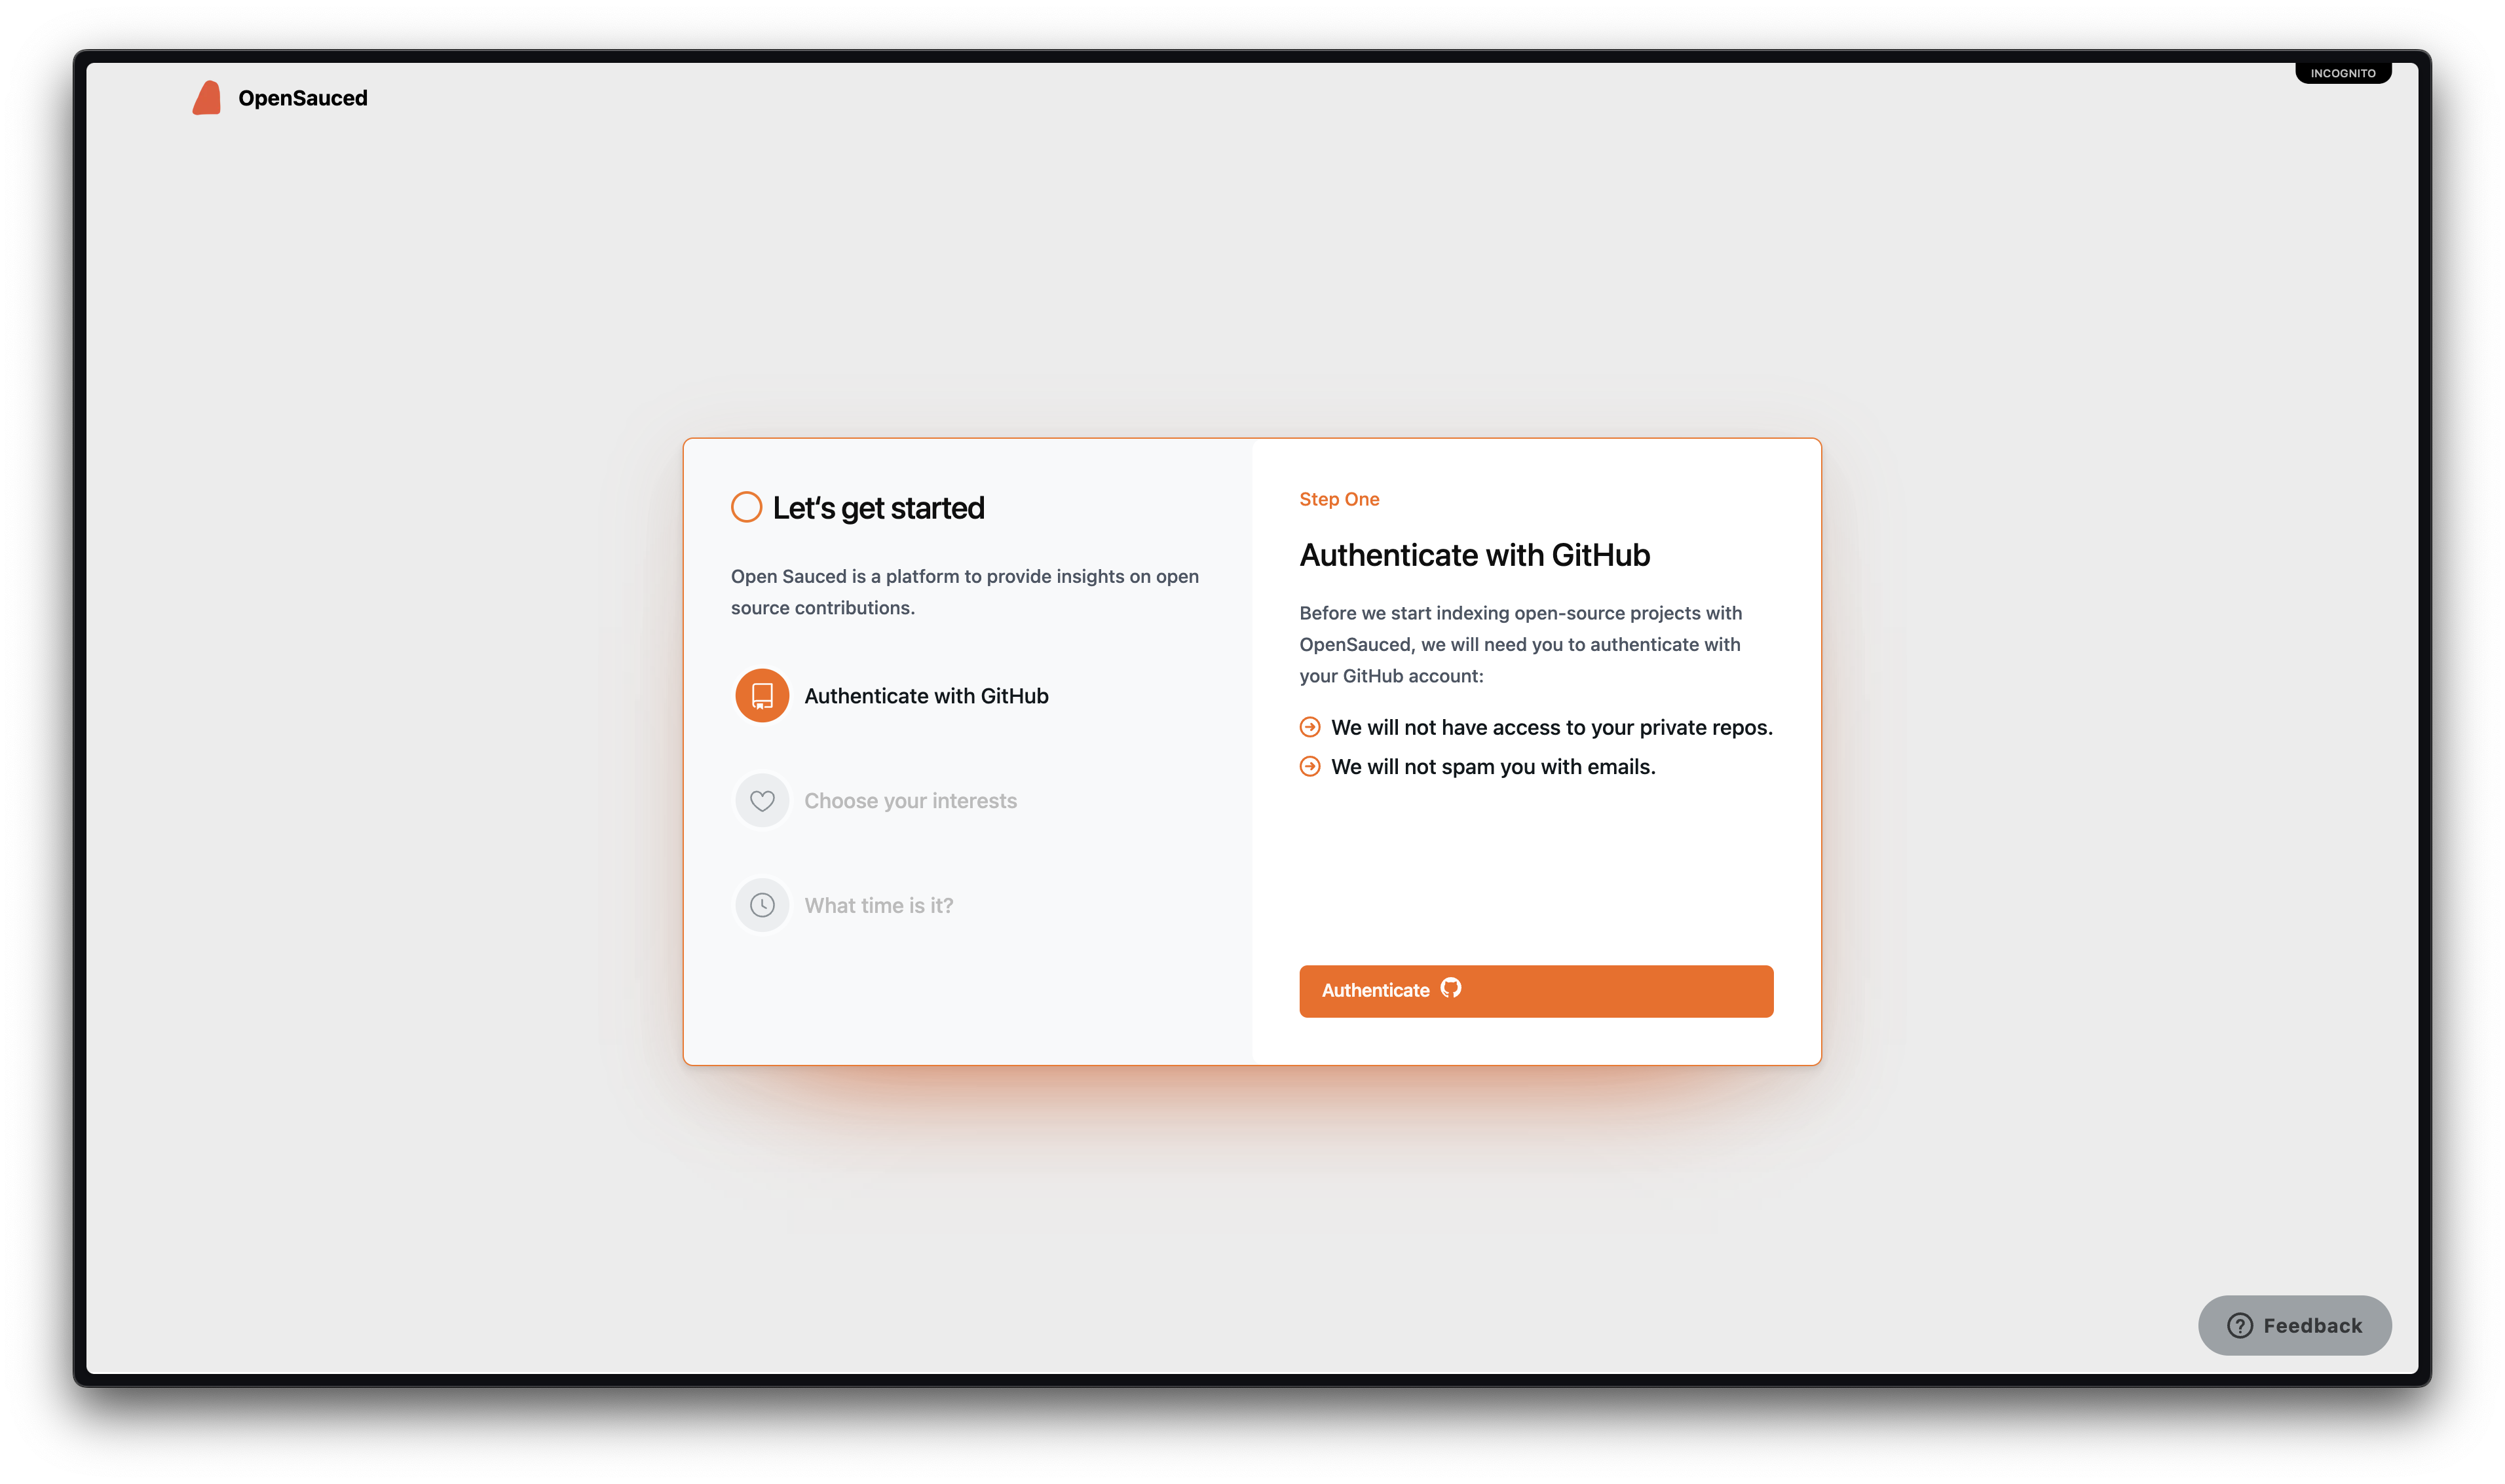
During the sign up process, you'll be asked to pick some interests and set your timezone. This will help OpenSauced recommend projects that align with your interests and schedule.
-
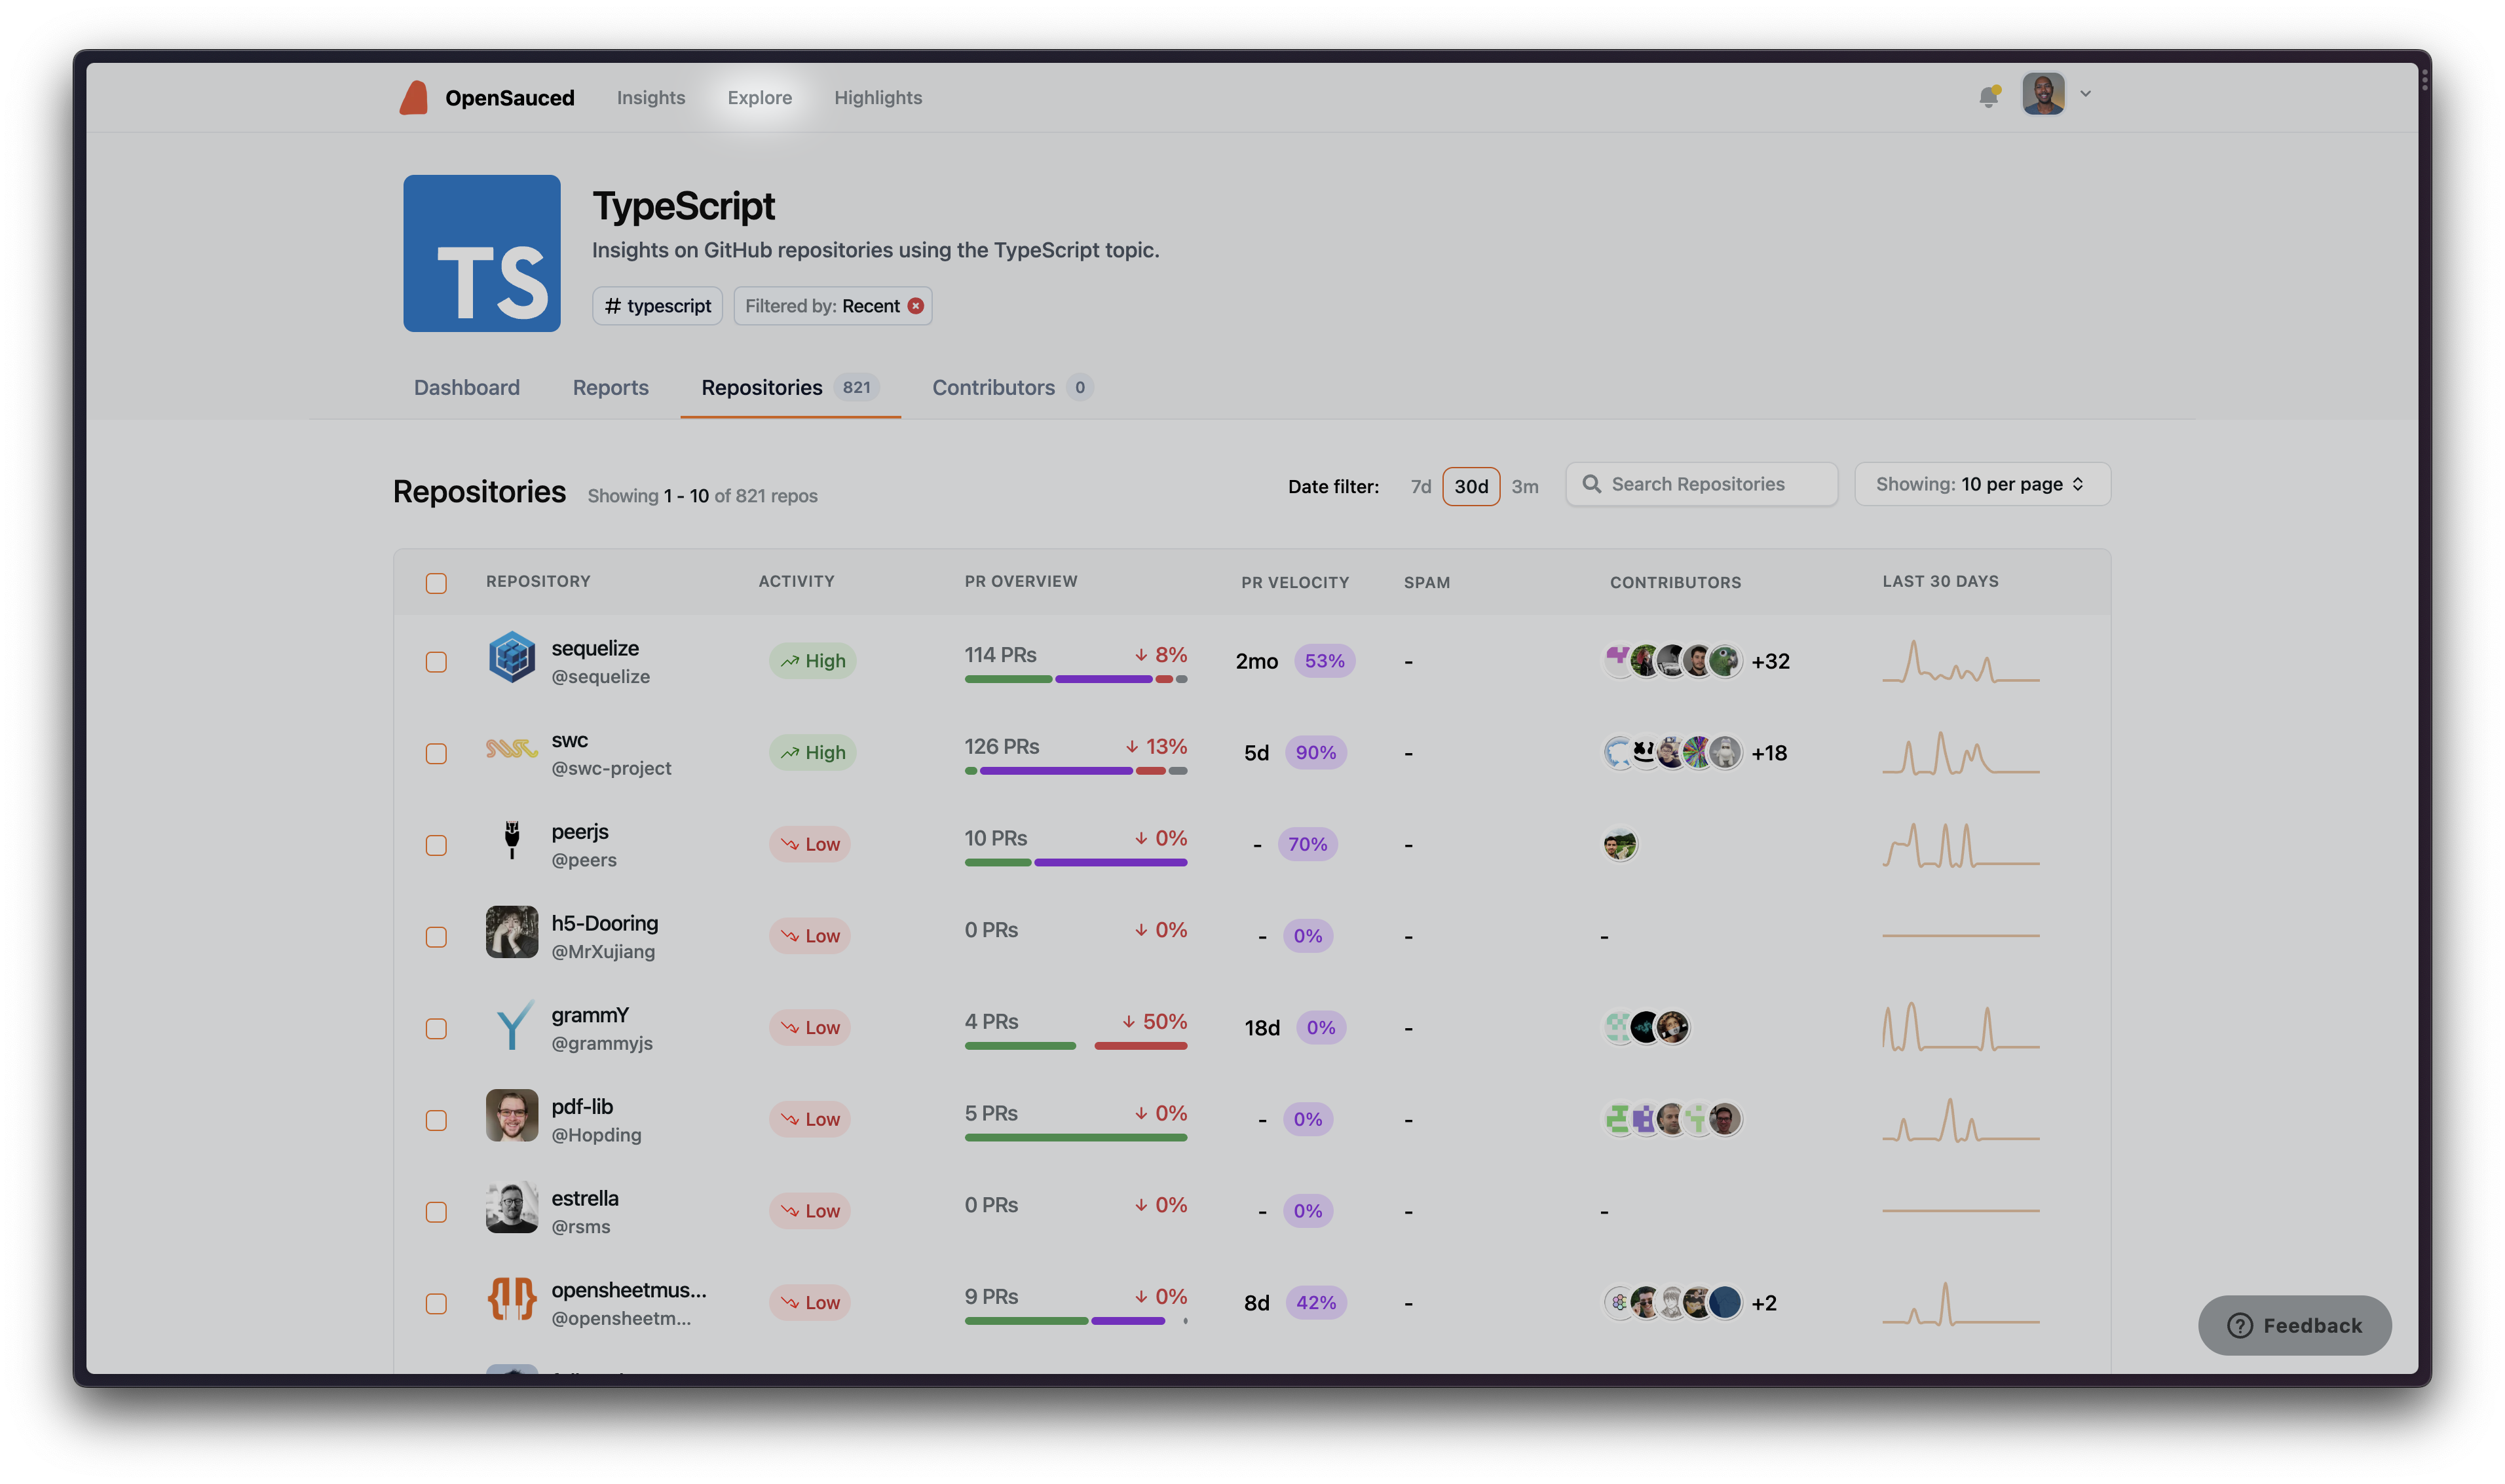
Explore dashboard: Once you've signed up, you'll be taken to your dashboard, where you can view your current projects, goals, and contributions. Clicking "Explore" in the header will take you to the Explore dashboard where you can browse projects based on your interests and skills.
-
Search for projects: In the Explore dashboard, you can see a list of repositories and their relevant activity levels and engagement levels that are currently trending. You can also search for projects by typing in the search bar. You can search for projects by name, description, or topic and use this tool to find something that resonates with you.
-
Save projects to your Insights pages: When you find projects you're interested in, you can add them to "Insights" pages that give you more details about the activity over the projects. Or, if you'd rather just dive in and contribute, you can skip to the next step.
-
Start contributing: When you click on the name of a repository, you'll be taken to its GitHub page, where you can explore issues that are open and ready for contribution, knowing that the community around this project is active and your contributions will be welcomed.
Understanding how to contribute to open source involves not only coding but also participating in discussions, reporting bugs, and improving documentation. By using OpenSauced, you can streamline the process of finding open source projects to work on and focus on contributing to the projects that align with your interests and goals.
Onboarding in a New Project
When you're interested in contributing to a new open source project, it's important to familiarize yourself with the project's guidelines, conventions, and workflow and take the initiative to onboard yourself.
Here are some tips to help you onboard successfully:
-
Read the project's documentation: Read the README file, contributing guidelines, and code of conduct to familiarize yourself with the project. They will help you understand the project's goals, requirements, and expectations for contributors.
-
Start small: When you're new to a project, it's a good idea to start with small, manageable tasks, such as fixing bugs, adding tests, or updating documentation. This will help you become familiar with the codebase and development workflow without getting overwhelmed.
-
Join the open source community: Many open source projects have online communities, forums, or chat platforms where developers can ask questions, share knowledge, and collaborate. To learn how to contribute to open source, you can connect with other contributors, learn from their experiences, and get help with any issues you encounter.
-
Ask for help: If you need clarification or encounter a problem, don't hesitate to ask for help. Open source communities are generally supportive and welcoming; other contributors will gladly assist you.
-
Be patient and persistent: Onboarding in a new project can be challenging, especially if you're new to open source development. Be patient, and don't be discouraged by setbacks or mistakes. You'll become more comfortable and confident in your contributions with persistence and practice.
Getting Started With Contributing
So, you've onboarded yourself in the project. Now, you can prepare to contribute by following these steps:
1. Read the Documentation
We touched on this briefly in the previous section. But it's worth revisiting because it's important to read the project's documentation thoroughly before you start contributing.
Start by reading the README and familiarizing yourself with the project. A README contains an introduction to the project, such as how it works, its purpose, the tech stacks it uses, and how to set up and run the local environment.
Once you're familiar with the project and interested in contributing, don't jump in without reading the contributing guidelines. These guidelines are in the CONTRIBUTING file at the project's root. If the file is unavailable, you can find them in the README.
Every project has different contributing rules. These rules are written in the contributing guidelines, which contain information on how to claim and work with issues, create pull requests, and preferable methods of communication. For example, you can look at the OpenSauced Contributing Guidelines.
Some projects also have conventions, such as code and Markdown style, how to write commit messages, pull requests and issue titles, and so on. You might find these in their style guide or contributing guidelines.
Read the contributing guidelines carefully to understand how the project receives contributions. Following these guidelines will make your contribution process smoother.
2. Find or Create an Issue
After reading the documentation, you can start looking for issues labeled as "good first issue" or "beginner-friendly" that are suitable for your skill level. When choosing which issues to work on, consider your interests, skill level, and available time.
Issues can be seen as proposals for changes. Suppose you want to report a bug or have ideas for a feature or improvement of the project or its documentation and want to propose them. In that case, you can create an issue to propose your intention. Read this blog post to learn how to fill in issue forms.
In open source, it is crucial to accompany a pull request with an issue for several reasons:
-
Context and Discussion: Giving context to your proposal and discussing it with the maintainers can help to ensure that the proposed change is aligned with the project's goals, architecture, and roadmap. This discussion helps set clear expectations and increases the chance of your pull request being accepted.
-
Documentation and Tracking: Issues act as a form of documentation, providing a historical record of the identified problem, proposed solution, and decision-making process behind the change. They help maintainers track the project's progress and prioritize tasks. At the same time, they also allow other contributors to understand the context and reasons behind the changes introduced in the pull request.
-
Reducing Back-and-Forth Communication: Discussing and agreeing upon the proposed changes in advance through the issue can reduce the back-and-forth communication during the pull request review process. This can save both your time and the maintainers' time.
-
Avoiding Unnecessary Work: Creating an issue allows maintainers to provide early feedback on the proposed change. They can advise if a similar issue exists, if the proposed change aligns with the project's goals, or if alternative approaches are preferable. This helps you avoid wasting time and effort working on something that may not be accepted because it conflicts with existing plans.
-
Avoiding Spam Pull Requests: Unsolicited (pull requests without an issue) and unwanted pull requests may be marked as spam because they're seen as introducing irrelevant, low-quality, or harmful changes to the project's codebase. Having your pull request marked as spam can lead to rejection, lost contribution opportunities, and potentially damage your reputation.
3. Ask to be Assigned to an Issue
Certain projects may have specific rules regarding the assignment of issues. Some projects may require you to ask permission before working on an issue, while others allow you to assign yourself to an issue. That's why reviewing the project's contributing guidelines is essential to knowing how to claim issues.
If the contributing guidelines do not state how to claim an issue, you can ask the maintainers to assign it to you. This will ensure no duplication and that your contribution is aligned with the project's goals and requirements.
You can leave a comment on the issue, like, "Can I please be assigned to this issue?" When the maintainer has assigned you, you'll notice that your username is now under the "Assignees" section.

Contribution Workflow
Once a maintainer has assigned you an issue, the next step is to work on the changes. Here's a general workflow of the process:
1. Fork the Repository
Forking a repository means creating a copy of the repository under your GitHub account. It allows you to push changes to the remote codebase without affecting the original project.
2. Clone the Forked Repository
Cloning your forked repository means making a copy of your forked repository to your local machine. Run the following command in your terminal:
git clone https://github.com/YOUR-USERNAME/REPOSITORY-NAME.git
Replace "YOUR-USERNAME" with your GitHub username and "REPOSITORY-NAME" with the repository's name.
3. Create a New Branch
Before making any changes, create a new branch in your local repository to work on your contribution. Creating a new branch is the best practice in open source because it keeps your changes separate from the main branch.
You can create a new branch using the following command:
git checkout -b YOUR-BRANCH-NAME
Replace "YOUR-BRANCH-NAME" with a descriptive name for your branch, such as "fix-bug-123" or "add-new-feature".
4. Make Changes
Now that you have a new branch, you can make changes to the codebase. Always follow the project's coding guidelines and conventions.
5. Run the Changes Locally
You should always run and check your changes in your local environment, regardless of how small they are. This is important to ensure they work as expected and won't break production.
You can find the instructions on how to run a project locally in the README file or in the contributing guidelines.
6. Add and Commit the Changes
Once you've made your changes, add your changes to the staging area and commit them with these commands:
git add .
git commit -m "Your commit message"
Replace "Your commit message" with a brief description of your changes.
7. Push the Changes
Push your changes to your forked repository on GitHub by running the following command:
git push origin YOUR-BRANCH-NAME
Replace "YOUR-BRANCH-NAME" with the name of your branch.
8. Working with a Pull Request
Create a Pull Request
Once you've pushed your changes, you can now create a pull request. To create a pull request:
- Navigate to the original project's repository on GitHub.
- Click the "Compare & pull request" button.
- Fill in all required information in the template.
- Click the "Create pull request" button.
Fill In a Pull Request Template
Most projects provided a pull request template that is shown and needs to be filled in Markdown. This template guides you in providing all the information maintainers need to review your pull request.
Tips to Fill In a Pull Request Template
It can be challenging to read and fill in a pull request template. Here is some tips on how to fill one:
-
Preview Mode
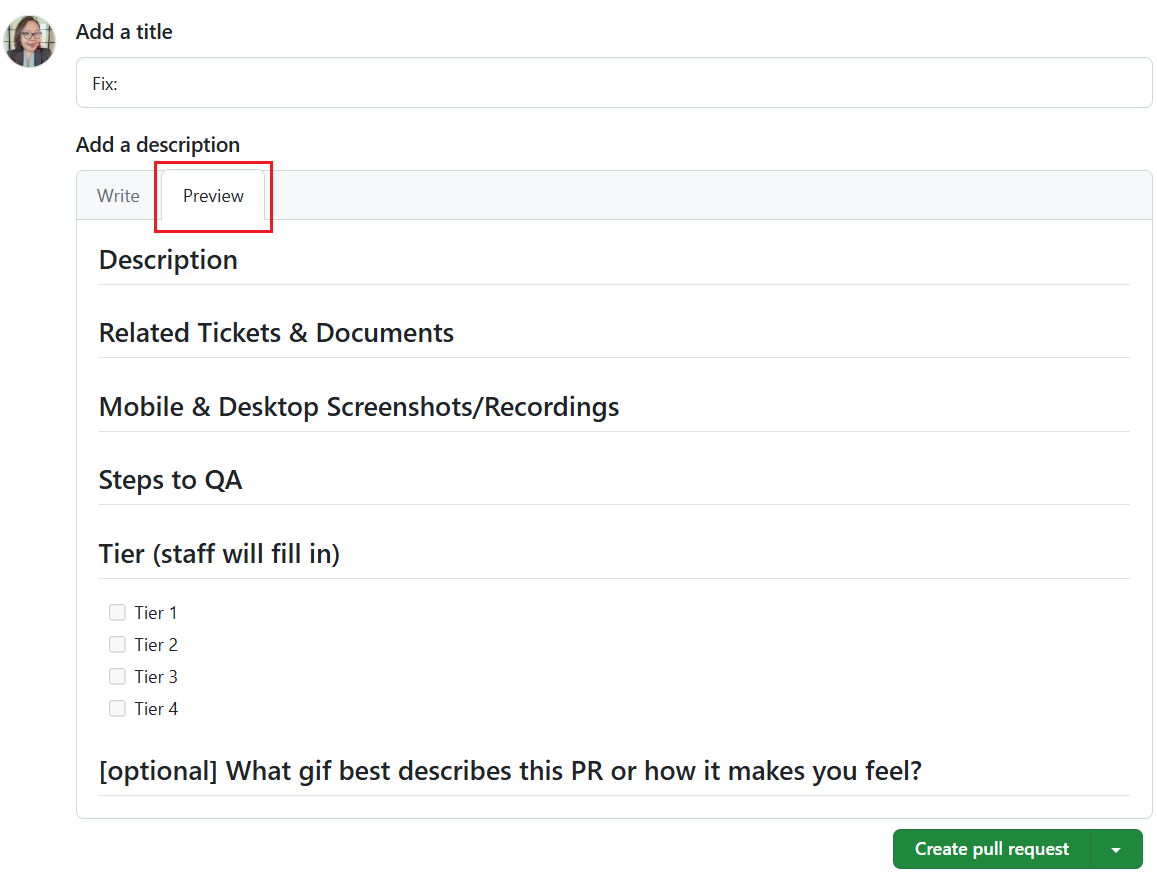
Click the "Preview" tab to see the sections you must fill in before you do so. It will be easier for you to notice them in this mode, but note that you cannot edit them in preview mode.
Here is an example of a pull request template at OpenSauced in preview mode:
-
Headings
Get back to the writing mode by clicking the "Write" tab. Pay attention to the headings with
#symbols. You need to provide information right under these headings. -
Comments
The instructions on what information you must provide are usually written in the comments under each heading. You need to read and follow all instructions thoroughly.
tipWhen filling in the information, write it below the comment so you can still see and follow the instructions.
Here is the template in Markdown. Now, pay attention to the headings and the comments as we discussed:
## Description
<!--
Please do not leave this blank
This PR [adds/removes/fixes/replaces] the [feature/bug/etc].
-->
## Related Tickets & Documents
<!--
Please use this format link issue numbers: Fixes #123
https://docs.github.com/en/free-pro-team@latest/github/managing-your-work-on-github/linking-a-pull-request-to-an-issue#linking-a-pull-request-to-an-issue-using-a-keyword
-->
## Mobile & Desktop Screenshots/Recordings
<!-- Visual changes require screenshots -->
## Steps to QA
<!--
Please provide some steps for the reviewer to test your change. If you have written tests, you can mention that here instead.
1. Click a link
2. Do this thing
3. Validate you see the thing working
-->
## Tier (staff will fill in)
- [ ] Tier 1
- [ ] Tier 2
- [ ] Tier 3
- [ ] Tier 4
## [optional] What gif best describes this PR or how it makes you feel?
<!-- note: PRs with deleted sections will be marked invalid -->
<!--
For Work In Progress Pull Requests, please use the Draft PR feature,
see https://github.blog/2019-02-14-introducing-draft-pull-requests/ for further details.
For a timely review/response, please avoid force-pushing additional
commits if your PR already received reviews or comments.
Before submitting a Pull Request, please ensure you've done the following:
- 📖 Read the Open Sauced Contributing Guide: https://github.com/open-sauced/.github/blob/main/CONTRIBUTING.md.
- 📖 Read the Open Sauced Code of Conduct: https://github.com/open-sauced/.github/blob/main/CODE_OF_CONDUCT.md.
- 👷♀️ Create small PRs. In most cases, this will be possible.
- ✅ Provide tests for your changes.
- 📝 Use descriptive commit messages.
- 📗 Update any related documentation and include any relevant screenshots.
--> -
Don't skip and delete anything in the template
What's important is that you must fill in every section in the template that doesn't say "optional" or doesn't mean for the core team or staff to fill in. Also, you must never delete or modify the template, even if you think a section doesn't apply to your contribution.
If a section is irrelevant to your changes, leave a comment explaining why it's irrelevant or provide a brief "N/A" response. If you still need help with what to fill in, look at the previous pull requests and see how other contributors have done that.
Required Information to Provide in Most Pull Request Templates
Every project is unique. Each has its own pull request template structure and requires specific information to be provided. However, all projects typically require the following:
-
Title
Add a short and clear title that describes the change that you make. For example, "Fix: Color contrast in the landing page".
-
Description
Explain your changes in as much detail as possible. What did you fix? How did you fix it? Did you add a new function or modify a function? If there are several changes, consider using bullet points and providing links to the resources you use to back up your changes.
Here is an example:
## Description

<!--
 Please do not leave this blank
 This PR [adds/removes/fixes/replaces] the [feature/bug/etc].
 -->

This PR fixes the long repos' names that are partially stacked at the back of another name in the search input of the Explore tab.

The changes made here:

- Add Tailwind className:

  - [`truncate`](https://tailwindcss.com/docs/text-overflow#truncate) to truncate overflowing text.
  - [`tracking-tighter`](https://tailwindcss.com/docs/letter-spacing) to reduce letter spacing for better space.
  - `inline-block` to the `<span>` .

- Remove Tailwind classNames:

  - `overflow-hidden` as it's [included in the `truncate`](https://tailwindcss.com/docs/text-overflow).
- `break-all` as we don't want to add line breaks. -
Related issue(s)
Most projects don't receive unsolicited pull requests (pull requests that are not accompanied by an issue). One reason is to avoid spam pull requests that might introduce irrelevant, low-quality, or harmful changes to the project's codebase.
So, when you create a pull request, you want to include the related issue number. Add the keyword "Closes," "Fixes," or "Resolves" in front of the issue number, for example, "Closes #123".
Linking a pull request to an issue will automatically close the issue once the pull request gets merged.
You can find the issue number right after the title, as shown below.
 info
infoOnly add the supported keyword and the issue number here. Adding more words will prevent the issue from being closed automatically.
-
Screenshots or screen recordings
If your changes relate to UI improvement, consider adding screenshots or screen recordings to show the before-and-after changes.
9. Respond to Feedback
After submitting your pull request, the project maintainers may provide feedback or request changes. Be sure to respond promptly and address any concerns or suggestions they may have.
By following these steps, you'll be able to submit your contributions to open source projects and collaborate with other developers to improve the codebase.
What Happens Next?
After your contribution has been submitted and reviewed, one of the following outcomes may occur:
-
Your contribution is accepted: If your contribution is approved by the project maintainers, it will be merged into the main branch of the codebase.
Congratulations! Your work is now part of the project, and you've made a valuable contribution to the open source community. -
Your contribution requires changes: Sometimes, the project maintainers may request changes to your contribution before it can be accepted. This could be due to coding issues, conflicts with other changes, or a need for additional documentation. In this case, make the requested changes and resubmit your pull request.
-
Your contribution is rejected: In some cases, your contribution may not align with the project's goals or requirements, or it may not be the best solution to a problem. If your contribution is rejected, don't be discouraged. Take the feedback you received as an opportunity to learn and improve. You can always try contributing to another project or submitting a different contribution to the same project.
Let's Get Practical
Now that you know how to find and contribute to open source projects, it's time to put your skills into practice. Let's do this by contributing to OpenSauced's guestbook repository.
Prerequisites
You'll need to have these tools downloaded and installed on your local machine:
Getting Started
The guestbook uses a simple, conflict-free contribution system. Instead of editing a shared file (which causes merge conflicts), you'll create your own JSON file. This means your contribution won't conflict with others!
Step 1: Create an Issue
Before contributing, create an issue to document your intention. This is an important practice in open source:
- Go to the guestbook repository on GitHub.
- Click the "Issues" tab on the top bar.
- Click the green "New issue" button at the top right.
- Click the "Get started" button to add contributors.
- Add a title, e.g.,
feat: Add @YOUR-USERNAME as a contributor. Replace@YOUR-USERNAMEwith your GitHub username. - Complete the form:
- Fill in your name
- Add your GitHub username
- (Optional) Add your location
- Share what you're learning
- Add a fun fact about yourself
- Click the "Submit new issue" button.
After submitting, note your issue number (e.g., #123) - you'll need this when creating your pull request!
Creating an issue first is a best practice in open source. It helps maintainers track contributions and allows for discussion before work begins.
Step 2: Fork and Clone the Repository
- Fork the guestbook repository.
- Clone your forked repository to your computer:
git clone https://github.com/YOUR-USERNAME/guestbook.git
cd guestbook
Replace YOUR-USERNAME with your actual GitHub username.
Step 3: Install Dependencies
Run this command in your terminal to install the required packages:
npm install
Step 4: Create a New Branch
Create a new branch for your contribution:
git checkout -b feat/add-YOUR-USERNAME
Replace YOUR-USERNAME with your actual GitHub username.
Step 5: Create Your Contributor File
- Navigate to the
contributors/folder in your code editor. - Create a new file named
YOUR-USERNAME.json(use your actual GitHub username in lowercase). - Copy this template and fill in your information:
{
  "name": "Your Full Name",
  "github": "your-github-username",
  "profile": "https://your-website.com",
  "contributions": ["code", "doc"]
}
Field Explanations:
name: Your full name as you want it displayedgithub: Your GitHub username (must match the filename!)profile: Your personal website URL, or usehttps://github.com/your-usernamecontributions: An array of contribution types (see options below)
Available Contribution Types:
"code"- Code contributions"doc"- Documentation"ideas"- Ideas and planning"bug"- Bug reports"tutorial"- Tutorials"design"- Design"review"- Code reviews"test"- Testing"blog"- Blog posts
For this first contribution, you can use ["code", "doc"].
Step 6: Preview Your Contribution (Optional but Recommended)
You can preview how your profile will look before submitting:
npm run contributors:preview YOUR-USERNAME
This will show you:
- ✅ Validation status
- 🎨 How your profile will appear in the README
- 🏷️ Your contribution icons
Example output:
✅ Contributor file validation passed!

🎨 Preview of your contributor profile:
==================================================
👤 Name: Jane Doe
🔗 Profile: https://janedoe.dev
📷 Avatar: https://github.com/janedoe.png
🎯 Contributions: code, doc

🏷️  Your contribution icons:
   💻 code
   📖 doc
Step 7: Commit Your Changes
Once you're satisfied with your contributor file:
git add contributors/YOUR-USERNAME.json
git commit -m "feat: Add YOUR-USERNAME as a contributor"
Step 8: Push to Your Fork
git push origin feat/add-YOUR-USERNAME
Step 9: Create a Pull Request
- Go to your forked repository on GitHub.
- Click the "Compare & pull request" button.
- Fill in the pull request template:
Pull Request Title:
feat: Add @YOUR-USERNAME as a contributor
Pull Request Template - Key Sections to Fill:
-
Type of Contribution: Check "🎉 Adding myself as a new contributor"
-
Checklist:
- ✅ I created a file named
contributors/[my-github-username].json - ✅ I filled in all required fields
- ✅ I only added ONE file
- ✅ My JSON file is valid
- ✅ I'm taking the Intro to Open Source course
- ✅ I created a file named
-
Link Your Issue: In the PR description, add:
Closes #123Replace
123with your actual issue number from Step 1. This will automatically close the issue when your PR is merged!
Using the keyword "Closes" followed by the issue number (e.g., Closes #123) is important! It automatically links your PR to the issue and closes the issue when the PR is merged. This is a best practice in open source development.
- About Me: Fill in your details:
- Name: Your full name
- Location: (optional)
- What I'm learning: e.g., "JavaScript and open source"
- Fun fact: Something interesting about you!
- Click "Create pull request".
Your pull request should only include ONE file: your contributors/YOUR-USERNAME.json file. You do NOT need to edit the README.md or any other files!
What Happens Next?
After you submit your pull request:
-
Automated Validation ✅
- GitHub Actions will automatically validate your JSON file
- You'll get a comment confirming your file is valid
- Or, it will tell you what needs to be fixed
-
Review by Maintainers 👀
- A maintainer will review your PR
- They may ask questions or request small changes
-
Merge 🎉
- Once approved, your PR will be merged to the main branch
-
Automatic Update 🤖
- After merge, a GitHub Action automatically updates the README
- Within a few minutes, your profile will appear in the Contributors section!
-
Celebrate! 🎊
- You've made your first open source contribution!
Verifying Your Contribution
To verify your contribution was successful:
- Go back to the main guestbook page
- Scroll down to the "Contributors" section
- Press
Ctrl+F(orCmd+Fon Mac) and search for your name - You should see your profile picture and name! 🎉
What Makes This Process Better?
Unlike traditional contribution methods, this approach:
✅ No merge conflicts - Each contributor creates a unique file
✅ Faster reviews - Maintainers can merge multiple PRs simultaneously
✅ Clear validation - Automated checks catch errors before review
✅ Beginner-friendly - Simple JSON format, no complex Git operations
Troubleshooting
"My JSON file has errors"
Common issues:
❌ Wrong:  { name: "John Doe" }           // Missing quotes around keys
✅ Right:  { "name": "John Doe" }         // Proper JSON format

❌ Wrong:  contributors/john.json with "github": "johndoe"
✅ Right:  contributors/johndoe.json with "github": "johndoe"

❌ Wrong:  "contributions": "code"        // Should be an array
✅ Right:  "contributions": ["code"]      // Array format
"I see merge conflicts"
With this new system, merge conflicts should be extremely rare! If you see them:
- Make sure you only modified YOUR contributor file
- Update your branch:
git checkout main
git pull upstream main
git checkout feat/add-YOUR-USERNAME
git merge main
"My validation failed"
Run the validation script locally:
npm run contributors:validate
This will show you exactly what's wrong with your file.
Need Help?
- 💬 Ask in GitHub Discussions
- 📖 Read the detailed contributor guide
- 🐛 Create an issue if you find a bug
Congratulations on your first contribution! 🎉
If you're ready for your next contribution, check out the pizza-verse repository and follow the contribution guidelines.
Keeping Branches Up to Date
It is highly recommended that you update your remote and local branches habitually. That way, your branch will have the latest update when merged into the main branch of the original (upstream) repository.
The best times to update your branches are before you push your changes to the remote repository and while you're waiting for your pull request to be reviewed.
Updating Branches
First, you must update your forked (origin) repository:
- Go to your forked repository on GitHub.
- Click the "Sync fork" button.
- Click the green "Update branch" button.
Then, pull the latest changes in the main branch in the origin repository to update your local working branch by following these steps in your terminal:
-
Go to your working branch.
git checkout YOUR-BRANCH-NAME -
Pull the latest changes with this command:
git pull origin main
Merge Conflicts
Merge conflicts are something you'll commonly encounter when contributing to an open source project. When two branches have made different changes to the same line(s) in the same file(s), Git cannot automatically determine which change to keep, resulting in a conflict.
When a merge conflict occurs, Git adds conflict markers (<<<<<<<, =======, and >>>>>>) to indicate the conflicting lines from different branches. Everything between the <<<<<<< and ======= is the changes that you worked on (current changes). And everything between the ======= to >>>>>>> is the incoming changes from the remote main branch.
You need to pay attention to the conflicts and decide how you want to resolve them. You can keep only your change, incoming change, or both changes.
Tips to Prevent Resolving Merge Conflicts Repeatedly
Some open source repositories, such as OpenSauced's guestbook and pizza-verse repositories, have high contribution activities in the same files that can cause merge conflicts.
Below are some tips to prevent you from resolving merge conflicts repeatedly when contributing to open source projects:
1. Following Instructions
Ensure you follow the instructions in the project's README or Contributing Guide, and don't miss any step.
2. Pull Request Form
Complete the template form and fill in all areas when creating a pull request.
If a repository doesn't provide you with a pull request template, you need to have these in your pull request form:
-
A descriptive title: A descriptive title would help maintainers and other contributors gain an idea of what your contribution is.
Consider using the following method to write your title:type: brief description of your contribution. For example,fix: color contrast issue on the navbar,feat: create a warning button, etc. -
A clear description of your pull request: Describe your pull request clearly. Consider explaining your changes, thoughts behind the solution, etc. A clear description gives maintainers and other contributors insight into the details of your changes. Here is an example of a clear description in a pull request.
-
The link to the related issue: Linking a pull request to the addressed issue will close the linked issue automatically when the pull request gets merged. This makes it easier for maintainers to keep their projects organized.
-
A screenshot or screen recording when you make a UI change: Providing screenshots or screen recordings will make it easier for maintenance to visualize your changes and review your pull request.
3. Resolving Merge Conflicts Immediately
If a branch has merge conflicts that must be resolved, the merge button is automatically disabled. So, maintainers are not able to merge the pull request.
When you notice merge conflicts in your pull request or if a maintainer asks you to resolve merge conflicts, fix them immediately. The sooner you resolve the conflicts, the sooner maintainers can review and merge your pull request.
Merge Conflicts in the Guestbook Repository
Good news! The guestbook has been updated with a new conflict-free contribution system. Each contributor now creates their own unique JSON file in the contributors/ directory, which means merge conflicts are extremely rare.
If you followed the instructions correctly and only created your own contributors/YOUR-USERNAME.json file, you should not encounter any merge conflicts.
However, if you do encounter conflicts (perhaps you edited other files by mistake), follow these steps:
Resolving Merge Conflicts
Before resolving merge conflicts, you must first update your branches. Then, follow these steps:
-
Check which files have conflicts:
git status -
If the conflict is in your contributor file (which should be rare):
- Open the file in VS Code
- Look for the conflict markers (
<<<<<<<,=======,>>>>>>>) - Keep your changes (between
<<<<<<<and=======) - Remove the conflict markers and incoming changes
-
If conflicts appear in other files that you didn't intend to modify:
- Accept the incoming changes - You should only be modifying your own contributor file
- Click the "Accept Incoming Change" option in VS Code
-
After resolving conflicts, validate your file:
npm run contributors:validate -
Add and commit your changes:
git add .
git commit -m "Resolve merge conflicts" -
Push your commits to your remote branch:
git push
The new system is designed to prevent merge conflicts. If you're experiencing conflicts, double-check that you:
- Only created ONE file:
contributors/YOUR-USERNAME.json - Didn't edit README.md or .all-contributorsrc
- Followed all instructions in the guide
As you continue to contribute to open source projects, you'll gain valuable experience, develop new skills, and build a strong portfolio of work. In the next chapter, we'll discuss some strategies for getting started with open source contributions, gaining traction in your contributions, and developing your open source resume.